


Gate 12, Sharjah, around twenty to five in the morning. I’m sitting on the floor against a pillar with a gold chain in one hand and a paperclip in the other that I’d borrowed off the check-in desk. Cousin’s nikah was that evening.
The knot was small and completely solid. Nineteen minutes. Two links had gone slightly out of shape by the time I got it open, and they’re still like that.I wasn’t disorganized. Nobody really teaches you how to pack jewelry for travel without tangling, so you end up finding out the hard way usually on a floor somewhere with a boarding call going in the background. There are only two things causing it, and both are easy to deal with once you know what they are.
Why jewelry tangles in the first place
Slack and clasps. That’s genuinely the whole thing.A necklace lying loose in a pouch has room to fold over itself. Fold it once, and one link now sits next to a loop it could pass through. Then the bag goes on a conveyor belt, into a car boot, down through some turbulence over the Gulf, and all that shaking does is give the chain a few thousand attempts at threading itself. Eventually it succeeds. It’s not bad luck, it’s just time and vibration.
And the clasp is the actual criminal. That little lobster claw is the only part of the whole necklace that can grab something. It hooks a neighboring chain, or its own links, or the bracelet sitting an inch away, and once it’s got hold the knot builds itself around that anchor point.
So every fix below is doing one of two jobs. Taking the slack out, or getting the clasp somewhere it can’t reach anything. Some do both, which is why the first one on the list is the one I’d actually recommend if you only read one.It also means a lot of the expensive travel cases are solving the wrong problem, but I’ll come back to that.
1. Straws. That’s it. Straws.
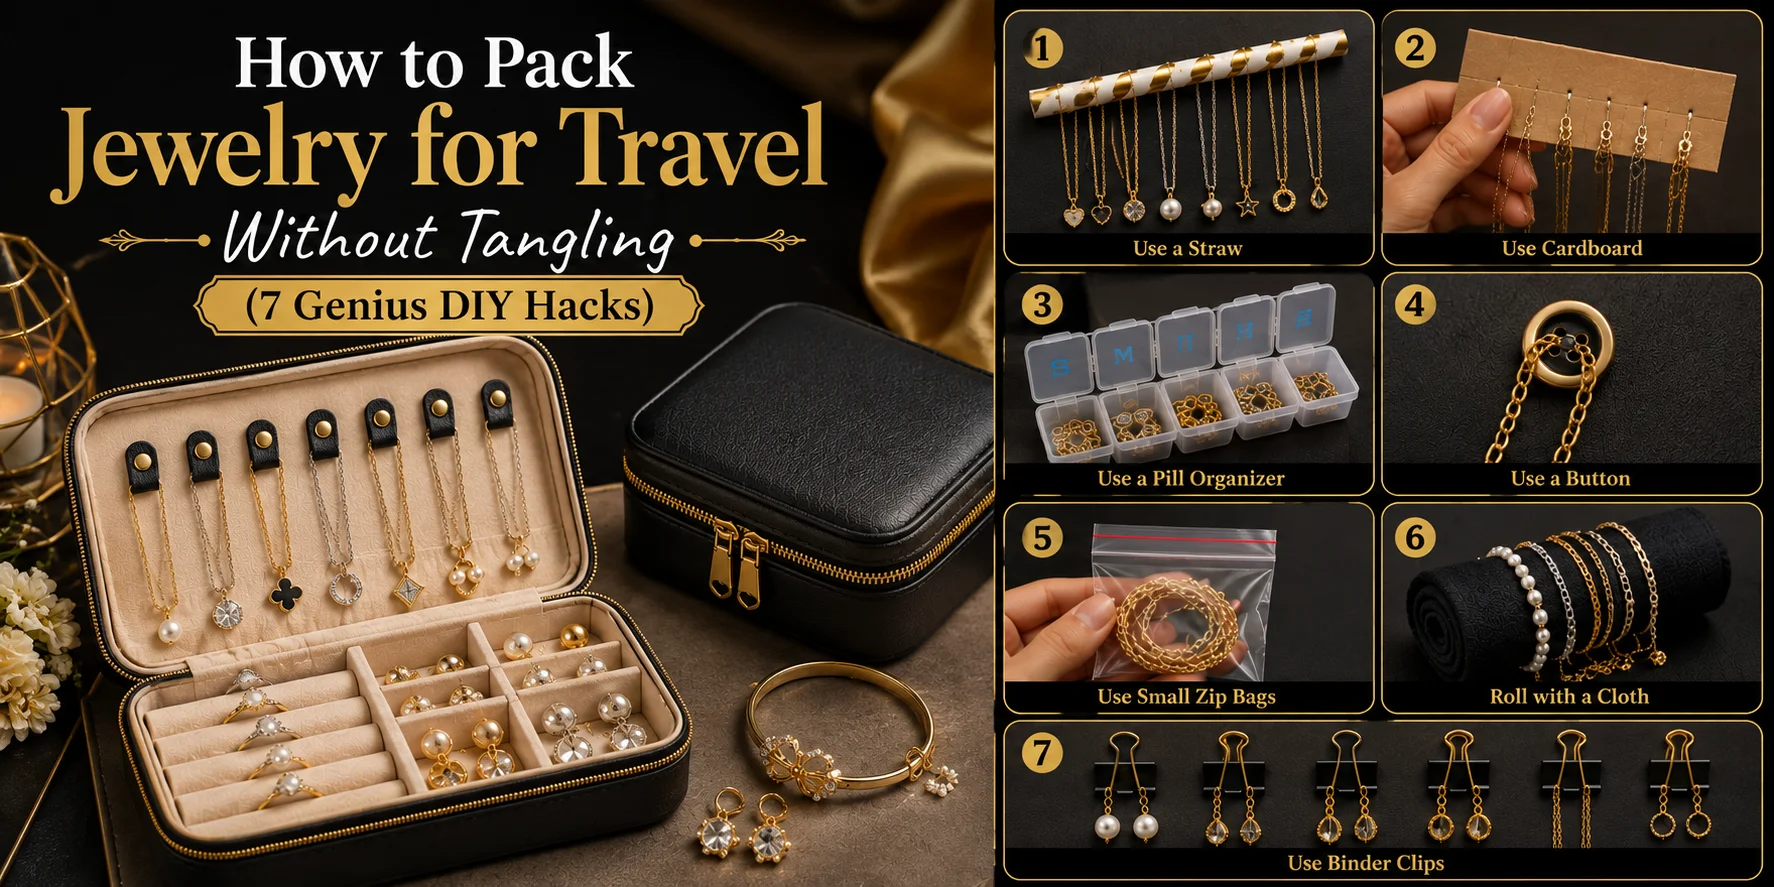
Someone should have shown me this a decade earlier than they did. I worked it out badly, in a hotel room in Deira, with a pair of nail scissors on the bed next to me in case I had to cut the chain.Take a plastic drinking straw. Cut it a bit shorter than the necklace say two-thirds the length. Open the clasp, feed one end of the chain in and push it all the way through, pull it out the far side, and do the clasp up around the outside of the straw.
Your necklace is now a stick.
It can’t fold. There’s a tube of plastic running down the middle of it holding it dead straight, so there’s no slack anywhere, and the clasp is pinned at the top where the nearest thing it could grab is three inches of plastic. Nothing to hook.
Bubble tea straws are the good ones. Wide bore, so a thicker chain goes through easily and sometimes a small pendant will slide right inside and travel protected. Regular straws handle fine chains, and you can do three or four delicate ones in the same straw if you’re patient, though threading the second and third gets fiddly. Paper straws work in dry conditions but go soft if anything spills a water bottle leaked in my bag once and the straw came out as pulp, though the chain was completely fine.
If the pendant’s too fat to fit, don’t force it. Thread the chain through and let the pendant hang outside at the bottom. A pendant swinging around loose isn’t really what causes knots, so you lose nothing.Four pre-cut straws live in the front pocket of my carry-on now. They cost nothing, they weigh nothing, and they’ve saved me more trouble than anything I’ve actually paid money for.
2. The cling film sandwich
Small warning first, because this one has a limit people run into. Not for pearls or opals though. Or anything porous, if the trip’s more than two or three days. The film seals moisture in against the stone, and pearls especially want a bit of air leave them wrapped for a week and the surface goes slightly dull in a way that doesn’t fully come back. Silver tarnishes in there too, sometimes faster than it would in open air.
Right. Now the good part. Tear off a sheet of cling film roughly the size of a magazine page and lay it flat. Space the jewelry out so nothing’s touching. Chains straight, not coiled. Fold the film over the top and press it down with your palm start in the middle and work out, mainly to push the air out, though I doubt it makes much difference which direction you go. Film sticks to itself and everything stays where you put it. The whole thing ends up flat and slightly stiff, a bit like a laminated page, so it slides into a side pocket or between two folded shirts without adding any bulk.
This is what I use for a matched set. Necklace, the earrings that go with it, the bracelet, all pressed into one sheet in the order I’m going to put them on. Sounds fussy. But standing in a hotel bathroom at six with forty minutes and wet hair, having them in order genuinely saves you something.Gold, steel, anything in a solid mount, this is great. For silver, tuck an anti-tarnish square in before you seal it, or skip ahead to number six.
3. Buttons
Earrings don’t really tangle. They vanish.One stud. Always one, and somehow always the same side, ending up in the lining of a bag or under a hotel bed where you find it never.So: spare button, the four-hole kind that comes sewn to the tag of a new shirt. Push one earring post through a hole, the other through the hole diagonally opposite, screw the backs on. They’re one object now. You can’t lose one without losing both, and losing both is much harder because a button is big enough to actually find.
Hoops go through the same holes and clasp shut. Hook earrings work too, though you want slightly larger holes for those, so a shirt button beats a coat button.I use a cream coat button off a jacket I don’t own anymore. Two pairs per button is about the limit before it starts getting awkward to undo, even though technically you can fit more.
4. Pill organizers, contact lens cases, mint tins
Rings, studs, and the tiny loose bits of jewelry that roll away, this is where they go.A weekly pill organizer, the seven-compartment one from any pharmacy, costs about a dollar fifty and is honestly one of the better jewelry organizers I’ve owned. Every compartment shuts on its own hinge, so Monday’s rings can’t migrate into Tuesday’s studs.
The lids are the only thing that matters here and it’s worth being fussy. Cheap organizers have thin lids that pop open under pressure in a packed bag, which undoes the entire point of buying one. Press a lid closed in the shop before you pay. If it clicks properly and stays, take it.
Contact lens cases are better for anything with a stone in it. Deep rounded wells, screw lids, and a wisp of cotton wool in the bottom kills any rattle. I’ve flown with a small solitaire in one more times than I’d tell the person who gave it to me.One thing worth knowing about rings: keep them in the case on the way to the airport rather than wearing them. Fingers swell and shrink at altitude, and a ring that fits fine at departure can be loose three hours later.Mint tins work too, folded tissue inside so nothing rattles. Not as good. Free, though.
5. A cardboard tube for bangles
Bangles have a completely different failure. They don’t knot, they go oval.Thin gold is the worst for it. It goes in flat, something heavy ends up on top of it for eight hours, and what comes out isn’t round anymore. Oval by a millimeter or two. Not dramatic, but you see it when it’s on your wrist, and straightening one properly is a jeweler’s job rather than something you fix at home.
Cut the inner tube from a roll of kitchen paper down to about four inches. Slide the bangles on, one after another, until it’s snug. If they’re loose on it, wrap the tube in a bit of cloth first to fatten it up so they grip.Now the pressure from outside is going into cardboard instead of into your bangle. And eight bangles travel as one object instead of eight objects clanking.
Then put the loaded tube inside a sock, which is where most of my travel jewelry ends up. It’s soft, it stops the outer bangle scratching the one next to it, and it’s already in your suitcase. It also just looks like a sock, which is worth something.Bracelets with clasps go on the same tube, clasped shut around the outside of it, same principle as the straw.
6. The felt roll (no sewing)
This is the homemade version of those roll-up organizers that go for twenty-five, thirty dollars, and I’d argue it works better.
You want a rectangle of felt about 12 by 8 inches. Craft felt, a dollar a sheet. Flannel does the job. An old soft t-shirt cut into a rectangle does the job at eleven at night before an early flight, which is when most of us are building anything.
- Felt flat on the table, long side going left to right.
- Fold the bottom third up. That’s your pocket, running the full width. Pin the two side edges with safety pins if you’ve got them and if you haven’t, don’t worry about it, the roll holds itself closed once it’s rolled.
- Push more safety pins down through both layers to split that pocket into sections. Three or four. Don’t overthink the spacing.
- Small jewelry into the pockets. Rings, buttoned earrings, spare backs.
- Straw-loaded necklaces laid flat across the top two-thirds.
- Roll from the bottom up. Snug. Not tight.
- Hair tie round it. Or the rubber band off a bunch of spring onions, which is what mine has on it currently.
The reason felt beats a nicer fabric is friction. Felt has a slight nap that grips a chain while you’re rolling, so nothing slides sideways into the next pocket halfway through. Silk pouches look far better and are worse at this, and I don’t think that’s a controversial thing to say, it’s just that silk sells and felt doesn’t.
Two dollars. Ten minutes, once, and then you own it.
7. The ziplock clasp trick
Open a small ziplock. Undo your clasp. Feed the chain into the bag but leave the clasp and the last inch hanging out, then close the seal onto the chain itself so the clasp is dangling outside the bag.The clasp is now sealed off from its own chain. Can’t reach anything. And the seal holding the chain at one fixed point takes most of the slack out of the rest of it.
Three or four chains per bag, each sealed at a different point along the closure, clasps lined up outside like luggage tags. Looks bizarre. Works.
This is my emergency one. Nothing to cut, nothing to prepare, ten seconds a chain, and the only thing you need is the plastic bag your toothbrush came in. Use the freezer ziplocks with the double track if you can. The flimsy sandwich-bag seals don’t hold a chain.While I’m here, a slightly related thing that isn’t about tangling at all.
Security trays. Those grey plastic ones. If you’re wearing rings or a bracelet through a checkpoint and you take them off, do not drop them straight into the tray. They’re small, the tray is scratched grey plastic, and they will sit there being invisible while you collect your laptop and your shoes and your dignity and walk off.
Put them in your pocket, or in your shoe, or in the zip of the bag going through the scanner. Somewhere with a lid or a wall. I’ve watched a man in Doha argue with three staff members over a wedding ring that had been in the tray behind his own laptop the entire time, and I’ve come close to being that man twice.Same logic as the rest of it, roughly. Though honestly the tray thing is more about attention than packing, so it doesn’t quite belong in this list. Including it anyway.
The eight-minute pack
Order matters more than any single hack. This is the sequence I use for packing jewelry for travel, about eight minutes for a normal trip.
Try this:
- Lay everything out on a pale towel on the bed. All of it. Look at it properly. Then remove 30 percent, because you know you’re not going to wear it. This single step prevents more tangling than everything else on this page and almost nobody does it.
- Straw every chain. Every one. Including the short one that never tangles, because that’s the one that will.
- Button the earrings. Backs on tight.
- Rings and small bits into the pill organizer. Shut the lids, then hold it next to your ear and shake it. Anything moving in there, add tissue.
- Load the felt roll. Chains flat, small stuff pocketed, roll it, band it.
- Roll goes in the carry-on. Under the laptop, flat against the back panel.
- Photograph the roll open, before you close it.
That last one has nothing to do with tangling and it’s the one I’d argue for hardest. One photo on your phone of everything laid out. If a bag goes missing you’ve got a dated visual record of what was in it, and that changes an insurance claim from an argument into paperwork. Four seconds.
Ayesha, six flights, zero knots
A friend of mine does textile sourcing. Her year is Karachi, Dubai, Manchester, Milan, again. She wears a lot of jewelry because in her work turning up looking unbothered is basically part of the job.Her system was a velvet drawstring pouch. Quite a nice one. Everything went in the pouch.
Last spring she showed me that pouch in a hotel lobby in Dubai and inside it were four chains, two of which had become one chain. She’d been picking at it in taxis for three days. One was a thin rose gold thing from her mother, and she was properly upset about it, more than she was letting on.
So we sat there and did the whole lot. Six straws cut from a pack of bubble tea straws she bought downstairs for about eight dirhams. Two buttons taken off a shirt in her case. Pill organizer from the pharmacy in the mall the next morning. The felt roll came later, at home, once she was convinced.Six flights over eleven weeks after that. I asked her about it because I wanted to know if it held up in real travel or only in my head.
No knots. None, across all six.
But the first thing she mentioned wasn’t the knots at all. It was that mornings got faster. She’d been losing four or five minutes a day going through that pouch before she could finish getting dressed, every single day, and she hadn’t really noticed until it stopped happening.The rose gold chain still has a slight kink from before. Mine does too, in the same place it’s always been.
Travel jewelry gear I’d skip
Not everything sold for packing jewelry deserves your money.Those hard-shell travel cases with the eight zip compartments and the little mirror in the lid? Overrated, I think. Bulky, thirty-five dollars and up, and the compartments are always sized for jewelry that nobody actually owns. Worst part is the chains still knot inside them, because a compartment doesn’t take slack out. It just gives the chain a smaller room to do it in.
Loose silk pouches are the same story. Lovely to own, bad at the actual job, because there’s nothing inside a silk pouch that stops a chain sliding around in it.
Cotton wool packed around a chain is worse than people expect. The fibers work their way into filigree and under prong settings, and then you’re sat there with a pin picking them out for twenty minutes.And skip anything that holds a chain in a coil. A coil is just a fold you’ve made on purpose.
Wearing everything on the plane so you don’t have to pack it I’ve done this. It feels efficient right up until you take it off to sleep, put it in the seat pocket, and walk off the aircraft without it.
One thing that is worth buying: a pack of anti-tarnish tabs. Little paper squares, a few dollars for a hundred, one in each pocket of the felt roll. Silver comes home looking like it left.
Where to pack jewelry in your bag
Carry-on. I’ll say it flatly because it’s the most common mistake and it’s got nothing to do with tangling — checked bags pass through a lot of hands and occasionally end up in a different city than you do.
Inside the carry-on, lay the roll flat against the back panel, the side that rests against your spine when the bag’s on your shoulder. Most protected spot, least flex.
Then take it out on day one. Empty the roll onto the desk or into a drawer. Jewelry sealed in plastic in a warm hotel room for a week is how silver goes gray and pearls dry out.
Hotel safes, quickly, because someone always asks. Fine for a laptop. For jewelry they’re okay without being sacred, and plenty run a master code across the whole property. If it’s something you’d be sick about losing, keep it on you, or keep it in the least interesting container in your luggage. Which brings us back to the sock.
I still keep straws in my carry-on. Four of them, cut short, bent from being sat on at some point. It’s the least impressive thing in that bag by a distance.But it fixed something I’d spent about a decade just putting up with, so.
FAQs
Does the straw trick work on long necklaces, 24 inches and up? Yes, but don’t cut the straw the full length of the chain. Cover about two-thirds and let the rest hang at the clasp end, since that’s where a long chain bends anyway. A very long straw is also more likely to snap in a packed bag. For something around 30 inches you can run two straws end to end.
Can I pack pearls like this? Straws and felt, yes. Sealed plastic, no. Pearls are porous, and plastic traps humidity against the surface. Give them their own pocket wrapped in soft cotton too, because they’re much softer than people expect and they scratch on almost anything.
What about a handbag, day to day? Same idea, smaller. One straw for the spare chain, a contact lens case for earrings you might swap into.
Does cling film damage gold or silver? Not the film. The trapped moisture, and any sulfur in the air, and that hits silver far harder than gold. Gold is fine short-term.
How do I stop a watch scratching everything? Separate it out entirely, don’t just give it its own compartment. A metal watch bracelet will mark anything softer it touches, so wrap it in a sock on its own and keep it away from the felt roll.
Is a proper jewelry roll worth buying instead of making one? If you travel constantly and want something that looks good, a nice one is pleasant to own, and I’m not going to pretend otherwise. But the felt-and-safety-pin version costs two dollars and grips chains better than most silk-lined ones I’ve tried. Make one first. You’ll know within three trips whether you want to spend the money.
My chain is already knotted. Now what? Flat surface, good light, one drop of baby oil or olive oil on the knot. Then two straight pins, not your fingernails. Work outward from the center of the knot to loosen it and don’t pull the ends — pulling is what leaves permanent kinks in fine chains. If it’s valuable and the knot’s tight, take it to a jeweler. Most will do it in a few minutes for almost nothing.
Can I put jewelry in checked luggage if I’ve got too much? No. Most travel insurance and airline liability terms exclude or heavily cap jewelry in checked bags, so if it disappears you’re probably not covered. If it won’t fit in the carry-on, bring less.