


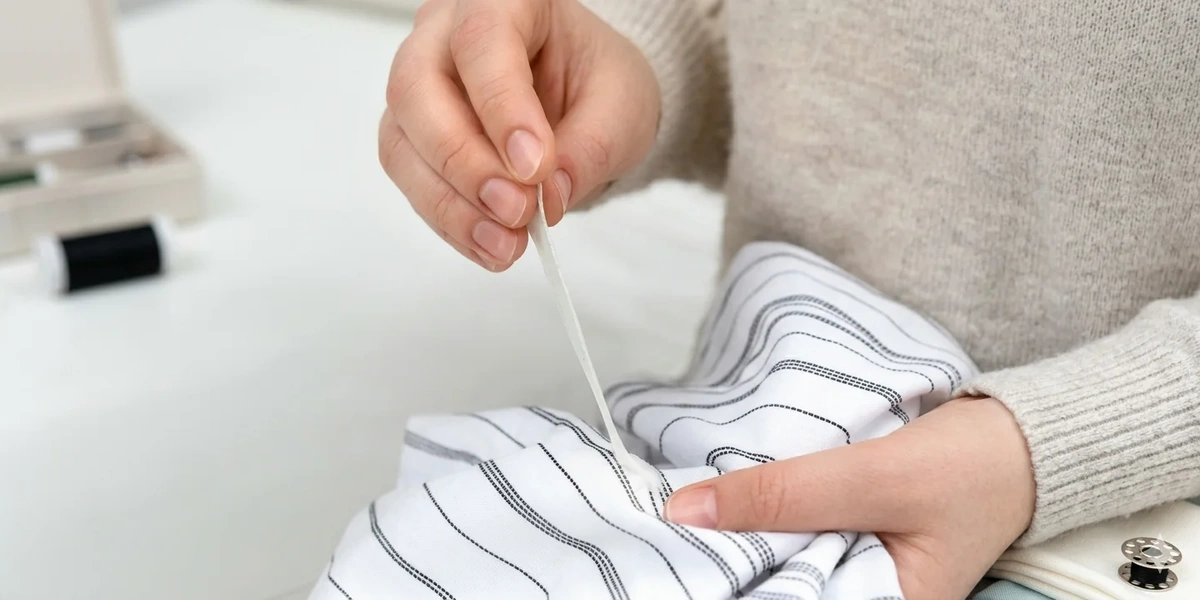
I found out the hard way, on a Tuesday afternoon outside a movie theater, sitting down on a bench I definitely should have checked first. Ticket already in my back pocket, popcorn on order, and then I stood up and felt it — that little sticky tug against my gray trousers. The ones I’d paid $38 for maybe two months earlier. Somebody had left a wad of gum right where I sat, and by the time I noticed, it had already worked itself into the weave.
I stood there in the lobby trying to peel it off with a fingernail, making it worse with every attempt. A guy walking past glanced over, smirked, and said, “Oh no. Welcome to the club.” Thanks, stranger. Very helpful. I sat through the whole movie afterward angled sideways in my seat, like that would somehow hide it from the row behind me. It did not. The sticky floor on the way out didn’t help my mood either, but that’s a separate rant about movie theaters in general.
That was a few years back. Since then I’ve pulled gum off my own clothes more times than I’d like to admit, off my kid’s school uniform twice, and (this one still makes me laugh) off a friend’s wedding dress hem about twenty minutes before she walked down the aisle, both of us on our knees in a church bathroom with a bag of ice from the reception hall’s cooler. Nobody warns you that gum removal is a life skill until you need it at the worst possible moment.
So here’s what actually gets gum out of fabric, in the order I’d try it myself. And what’s just a waste of your afternoon.
Ever notice how gum only ever lands on the clothes you actually like? Never the ones sitting in the donate pile. Feels almost personal.
Anyway. Let’s get into it.
Why Gum Fights Back
Quick bit of context before the how-to part, because it changes what you should do.
Chewing gum’s base is a synthetic rubber, more or less. It doesn’t dissolve in water, and it gets softer, stickier, stretchier, the more warmth and friction you give it. That’s the entire problem, right there. Your body heat softens it. Rubbing it with your fingers softens it more. By the time most people start “fixing” the situation, they’ve already made it worse, pressing the gum deeper into the fibers instead of lifting it out.
It’s worse in summer, too, if you’ve ever noticed. Hot weather keeps gum soft and workable long after it’s landed on you, which is part of why getting chewing gum off clothes always feels harder in August than it does in January.
It’s a lot, I know. Same reason it’s such a nightmare pulling gum out of hair, if you’ve ever dealt with that particular disaster. Different fix, same stubborn material. But it’s also good news, weirdly enough: once you understand that gum hates cold and doesn’t respond to panic-scrubbing, the whole fix gets a lot simpler.
Start With the Freezer
This is the one to try first. Every time, no exceptions, no matter the fabric or how big the gum wad is.
Cold makes gum brittle instead of stretchy. Brittle gum cracks off clean. Stretchy gum just smears around and grabs more fabric on its way. Exactly what you don’t want.
Here’s the process:
- If the item’s small enough (a shirt, pants, a kid’s jacket), bag it and stick the whole thing in the freezer for 30 to 60 minutes.
- If you can’t freeze it whole (a couch cushion, a jacket someone’s currently wearing, a car seat), press an ice cube directly onto the gum for 5 to 10 minutes. Wrap it in a thin plastic bag first so you’re not soaking the fabric while you’re at it.
- Once the gum’s hard (it should feel like a little pebble, not a wad), pop it off using something with a dull edge. A butter knife works. So does the edge of a credit card, or the back of a spoon. You’ll hear it crack a little as it comes loose, which is oddly satisfying every time.
- Work from the outside edges of the gum inward, not the other way around. Scraping from the middle out just pushes gum deeper into the threads next to it.
That’s the whole thing. Four steps, fifteen minutes, and it handles most gum-on-clothes situations without a single product from under your sink.
No freezer around? This happens more than you’d think — you’re at work, at a party, somewhere with zero access to a chest freezer. A cold can from the fridge or a bag of frozen vegetables held against the spot works nearly as well. Anything cold and solid enough to hold its shape against fabric for a few minutes will do the job in a pinch.
One honest caveat: if the gum’s spread over a bigger area (say someone sat on it, then walked around for a while smearing it further), freezing gets most of it off, but maybe not all. That’s normal. Don’t panic, and don’t start scrubbing out of frustration. Just move on to the next step.
Still Sticky? Vinegar Beats Peanut Butter
After the freezer trick, you’re usually left with one of two things: nothing at all, or a faint sticky patch with a little shine or discoloration where the gum used to sit. This is round two.
Vinegar, warmed up. Heat white vinegar for about 20 seconds in the microwave, or run the bottle under hot tap water for a minute. Dab it onto the spot with an old toothbrush or a clean cloth, let it sit for five minutes, then scrub gently in small circles before rinsing and washing the item as usual. The acid breaks down whatever sticky residue the cold couldn’t crack off.
If I had to pick just one backup method, this is it. It’s already in your kitchen, it’s cheap, and it doesn’t leave behind a stain of its own the way some oil-based tricks can.
Peanut butter, if you’re curious. Sounds ridiculous. Works anyway. The oil in peanut butter (or olive oil, or even mayonnaise, if you’re that desperate) loosens gum’s grip the same way it’d loosen any greasy, stuck-on mess. Rub a small dab straight onto the spot, give it three to five minutes, then scrape it off with the same dull-edge trick from before. Wash it right after, maybe twice, or you’ll swap one stain for another, and that’s not exactly progress.
I don’t love this method, if I’m picky about it. It works, but you’re trading a gum stain for a grease stain you now have to deal with too, and if the fabric’s light-colored, that’s a gamble I only take once vinegar’s already let me down.
And if neither of those does the trick, say the gum went through a hot wash already (don’t do that, but it happens to the best of us), a spray lubricant like WD-40, or a store-bought remover like Goo Gone, will usually finish what’s left. Spray it on, wait two or three minutes, scrape, then wash with regular detergent. Patch test on a hidden seam first, though. A lot of those “gum remover” sprays sitting near the checkout counter for $8 or $9 are just WD-40 with fancier packaging, if you ask me. The actual can does the same job for a fraction of the price.
A pink or blue stain left behind. That’s a different problem, not the gum anymore, just dye that stuck around after the gum itself lifted off. Skip the vinegar for this part and reach for an oxygen-based stain remover like OxiClean, or a scoop of color-safe bleach powder, dissolved in warm water. Soak the spot for 20 to 30 minutes before washing. Regular detergent alone usually won’t touch a dye stain, no matter how many times you run it through the wash. You need something built to break down pigment, not just stickiness. Test it on an inside seam first if the garment’s brightly colored, too. Most oxygen cleaners are color-safe, but “most” isn’t the same as “all.”
The Iron-and-Paper-Bag Trick
This one surprises people, because it’s the opposite approach. Instead of freezing gum to make it brittle, you melt it and let it transfer onto something else entirely.
- Lay the fabric gum-side down on an ironing board.
- Slide a brown paper bag or a few layers of paper towel underneath, right against the back of the gum spot.
- Set your iron to low or medium heat. No steam.
- Press for a few seconds at a time, checking often.
- The melted gum should soak into the paper instead of clinging to your clothes.
If you’ve ever pulled candle wax out of a tablecloth this way, it’s the same idea exactly. It works well on flat, sturdy fabric: denim, cotton, canvas. I wouldn’t try it on anything delicate, or anything with a synthetic blend that could melt under heat, because there’s a real chance of scorching if your iron runs even a little hot or sits too long in one spot.
Delicate Fabrics Need a Slower Hand
Silk, wool, cashmere, anything marked hand-wash-only on the tag — skip the vinegar, skip the peanut butter, and definitely skip the iron. Stick to the freezer method, and only the freezer method. It’s the gentlest option here, since there’s no heat, no chemicals, no scrubbing involved at all.
Wool coats and blazers belong in this group too, even though they don’t feel as delicate as silk. The weave holds heat and scorches more easily than you’d expect, so don’t get cocky with the iron trick just because it’s a heavier fabric.
If freezing doesn’t get everything off a delicate piece, that’s where I’d personally stop pushing my luck and hand it to a dry cleaner instead. A cleaning fee, usually somewhere around $10 to $15, is nothing next to what it costs to replace a cashmere sweater you wrecked trying to save that ten bucks.
Leather runs on a similar logic. Freeze it, then scrape gently using something plastic, never metal. A metal edge scratches leather in a way that doesn’t buff back out, and now you’ve traded a small problem for a much bigger one.
Remember those gray trousers from the bench outside the theater? Freezer method, twenty minutes, gone without a trace. Didn’t even need the vinegar. Wore them out to dinner that same night like nothing had happened.
Gum on Shoes and Shoelaces
Sneakers get hit almost as often as pants do, usually from stepping on a piece stuck to the sidewalk instead of sitting on one. Canvas uppers respond to the same freezer trick as any other fabric: bag the shoe if it fits, or hold an ice cube against the spot for a few minutes until it hardens.
Rubber soles are actually easier. Let the gum harden with cold, then flex the sole a little as you scrape. It tends to pop right off, since rubber doesn’t grip gum the way woven fabric does. Shoelaces are the one exception where I don’t bother fighting it: a new pair costs less than $5, and gum worked into braided laces is one of the more annoying things to pick out by hand for very little reward.
White canvas is worth a special mention. Skip the vinegar and WD-40 there if you can help it, since both can leave a faint yellow tinge behind over time. Freezer, scrape, then plain soap and water for whatever’s left. Slower, but it won’t cost you the color.
If Gum Already Went Through the Wash and Dryer
This one’s its own headache, and it happens more than people admit. A stick of gum gets left in a pocket, goes through the whole wash cycle unnoticed, and comes out of the dryer melted, not just onto that one item but smeared across half the load and baked onto the inside of the drum itself.
For the drum: run an old towel through a hot cycle first, which sometimes pulls loose gum off the walls on its own. If that doesn’t finish the job, freeze what you can reach with a bag of ice held against the metal, then scrape with a plastic edge. A dab of WD-40 on a cloth works on stainless drums too. Just wipe it down completely and run an empty hot cycle afterward before washing anything else in there.
For the clothes themselves, treat each spot the way you’d treat fresh gum: freezer first, then vinegar or WD-40 for whatever’s left. It just takes longer, since the dryer’s heat has already worked the gum in deeper than it would’ve managed on its own. Worth checking every pocket before laundry day, every time. Takes ten seconds and saves you this entire mess.
Front-load washers have a version of this problem too, just earlier in the process. Gum can work its way into the rubber door gasket during the wash cycle itself, before the dryer’s even involved. Same basic fix — ice to harden it, a plastic scraper to lift it, then a wipe-down with vinegar to clear the residue and the smell.
One Last Step Before You Dry Anything
Whatever method got you here, don’t toss the item in the dryer until you’ve checked the spot in good light, ideally while it’s still a little damp. Heat is what makes gum stains permanent, and that’s just as true after treatment as it was before you started. A spot that looks gone while the fabric’s wet can still show back up once it’s dried and heated, so let it air dry first if you can, or run it on a low, no-heat setting and check again before committing to a full hot cycle.
Takes an extra ten minutes. Saves you from finding out three loads of laundry later that the faint shadow you shrugged off is now permanent.
The Mistakes That Make Gum Worse
I’ve made every single one of these, so take this as the list I wish someone had handed me first.
- Don’t throw the item straight in the dryer before treating it. Heat sets gum permanently into the fibers: it stops being “stuck on top” and becomes “melted into the weave,” turning a fifteen-minute fix into a much longer, much harder one.
- Don’t scrub hard while the gum’s still warm and soft. You’re not removing it at that point. You’re just spreading it across more fabric than it started on.
- Don’t reach for a sharp knife. A dull edge lifts gum off. A sharp one nicks the fibers underneath it, especially on knits or anything textured.
- Don’t pour hot water on it as your first move. Feels intuitive (heat loosens things, right?) but gum specifically just gets softer and stickier under hot water, so it smears instead of lifting away.
- Don’t grab the scissors. I’ve watched someone cut a chunk clean out of a perfectly good t-shirt over a wad of gum the size of a pea, when thirty seconds in the freezer would’ve done the job with the shirt still in one piece.
- Don’t leave it sitting for days “to deal with later.” The longer it sits, especially somewhere warm, the deeper it works into the fabric, and the harder every method above becomes.
A Cheat Sheet, If You Just Want the Short Version
Here’s the whole thing boiled down, for anyone who skipped straight to the bottom:
| Situation | What to try |
|---|---|
| Fresh gum, cotton or denim | Freezer, then scrape |
| Sticky shadow left after scraping | Freezer first, then warm vinegar |
| Pink or blue dye stain | Oxygen-based stain remover, soak before washing |
| Delicate fabric (silk, wool, cashmere) | Freezer only, nothing else |
| Leather | Freezer, then a plastic scraper, never metal |
| Gum already run through a hot dryer | WD-40 or a store-bought remover, then wash |
| Still stuck after all of the above | Take it to a dry cleaner, don’t force it |
Small Habits That Save You the Hassle
You can’t dodge gum forever. But a couple of habits cut down how often you deal with this at all.
- Give park benches, movie theater seats, and bus stop benches a quick glance before sitting down. Takes two seconds, saves you twenty minutes later.
- Check pockets before laundry day, every time, no exceptions: for gum, for tissues, for whatever your kids decided to stash in there.
- If you’ve got kids, this is the real one: gum goes in the trash. Not under the desk, not on the playground slide, not “saved for later” pressed into the corner of a backpack. Ask me how I know.
- Keep a small pack of wet wipes in your bag or car. Won’t fix gum that’s already set in, but it’s handy for catching things in the first thirty seconds, before your body heat gives it a chance to spread.
If this happens to you often enough (parents of small kids, laundromat regulars, anyone who spends their day around a lot of foot traffic), it’s worth putting together a tiny “gum kit.” A sandwich bag of ice cubes kept in the freezer, a small spray bottle of vinegar, an old toothbrush. Costs almost nothing to pull together, and it means you’re never starting from zero when it happens again.
When to Just Let Someone Else Deal With It
Sometimes the smarter move is admitting defeat early, before you’ve made things worse trying to be the hero.
Suits, formal dresses, anything with embroidery or beading, or gum that’s already gone through a hot dryer cycle and set in deep. That’s when a professional cleaner earns their fee. They’ve got solvents and tools you don’t have sitting under your bathroom sink, and they’ve dealt with worse than whatever’s on your sleeve right now.
Is it a little annoying to pay someone for something you feel like you should manage yourself? Sure, sometimes. But it’s a lot less annoying than explaining to your mother-in-law why the scarf she gave you now has a permanent grey smudge shaped vaguely like a thumbprint.
Next time you feel that little tug against your leg on a park bench or a bus seat, you’ll know exactly what to do. And it won’t ruin your afternoon the way it ruined mine — minus, hopefully, the stranger’s commentary.